
Assigning and Triggering Samples.
- Geoff Schoeffel
- May 11, 2016
- 2 min read
One of Mainstage's most attractive features is it's ability to easily trigger audio samples. This is most easily done through the ESX24 instrument plug in, which comes with Mainstage. Load in an audio file to the sampler, map it to a key, and you're good to go. Below I will explain how to assign and trigger samples, as well as some common setups, tips, and tricks.

1)To begin, create a new instrument channel and insert the ESX24 sampler. This is achieved by clicking the plus sign in the upper right, and choosing the ESX24 from the instrument input tab.
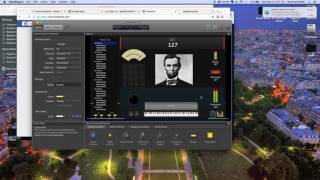
2) This is a two-part step. First click on the ESX24 instrument button and the instrument's main window will pop up. From there click on the Edit button located in the right corner below the View tab.


3) The Edit Window is where you will be able to add samples. You can either drag and drop audio files into the window , or you load files by going to /Zone/Load Multiple Samples.
4) Now that you have one or more audio files loaded in the ESX24, you'll need to edit the default parameters to fit your needs.

I will go through the parameters that will be of most value. If you want more information check out this article.
The Lo and HI button determine which key the sample gets mapped to. I tend to map it to the highest key on my keyboard and move chromatically down, so typically, both of those are set to C6.
The other buttons I typically use are the Pitch and 1Shot checkboxes. I un-check Pitch and check 1Shot.
A completed sample setup (for me), looks like this:

Now you have a sample mapped to the C6 key. If you wanted to add more samples, the same steps apply.
The ESX24 is an amazing program with tons of control and features. Now you can begin to utilize it in your productions. As always, if you have more questions or are interested in professional sound design, contact Performance Audio Solutions.


Comments