
Gain Staging, the best way avoid clipping and have a great sounding system.
- Apr 20, 2016
- 4 min read
It’s not too uncommon to hear the crunch of distortion coming from front ensembles as they try to push samples, synths, or keyboards too hard. This article is about setting levels correctly every step of the way to completely get ride of distortion.
Audio distortion happens when a signal is too hot for it’s destination and this can be caused at every step of the chain. For our example we will be using a hardware sampler. Let’s walk through a typical signal chain,and talk about how to set proper levels.
The first part of the chain is the not the output of the sampler, but the level of the audio file inside the sampler. If you use an audio workstation to create your samples, exporting the files with too hot of a signal will cause them to distort when they become part of another signal chain. Exporting them at a medium to low-medium level will give you plenty of room to gain stage elsewhere. I suggest normalizing a sample with a little room to go before hitting the ceiling. Try and minimize large spikes in level as much as possible.
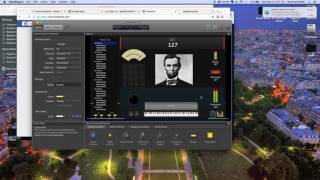
The next part of the chain is the output of the sampler. As much as possible, I like to eliminate variables in the signal chain as much as possible. The sampler is a good example of this. I always have the output of samplers at 100%. This means recalling that volume is simple….just turn it up all the way. This also means I can eliminate it in the gain stage signal chain, if it’s always at the same place, I can stage my levels elsewhere. In a computer sampler, set the fader of the chain to unity (0). This means that whatever signal is coming into that fader is coming out…there is no amplification or attenuation at unity gain. Many plug ins, as well as the master fader, have options for amplification. If you can help it, eliminate these variables. Set the master fader to unity always, except for extreme cases.
Now that your signal has left the sampler, it makes it’s way through cabling into a channel path on your mixer. If it passes through a DI box on the way, make sure the pad is not pushed down. In the case of an accident and that button gets pressed, you want your signal to be quieter and not louder (cue the horror stories). Now that your signal is on a channel in the mixer, it passed through the preamp/gain (more on that in a second) and is usually subjected to EQ options, sometimes compression. Again, I suggest not using these options. If your sample needs compression or EQing, why not do it in you computer before loading the sampler? Doing that will eliminate the need to add more volume variables in your signal path. At the very end of the channel lives the fader. This is a good place to play around with the volume. Since everything before this fader will always stay the same, you know that you can trust your fader to be an accurate source of volume. Aim for unity and if your samples need to be tucked down or up, bring it to the appropriate level. If everything has been done correctly, you shouldn’t need to “peg” the fader to the very top. If you find that it is pegged, perhaps reload the sample a little hotter. The way I like to set volume is to pull the fader to unity and then turn the preamp up until I reach a good level.
After leaving the channel fader, you signal now outputs to the the main stereo outputs. Set this fader to unity and mix your instruments around it. The master fader is usually red, that means “to be used only if necessary”.
Now your sampler leaves the mixer as part of a signal path that includes everything else you have going out of the stereo outs. This signal needs to pass through an amplifier before finally going out of the speakers and into the ears of the audience. Turn up the amps until you are getting a healthy signal. I like to turn the amps up a little past what is loud enough for whatever high school field or gym I am at. That way, once I'm in a bigger venue with more people, I have room to go. If it's too loud for your home turf, attenuate the master fader. Once you’ve found a good level on the amps, mark it with tape or a sharpie. It is very easy move these knobs on accident.
To sum up, let’s outline the signal path from source to speakers:
Internal source.
Output of source.
DI box.
Channel input.
EQ/Compression/Gain Knob.
Channel fader.
Master fader.
Amplifiers.
Some basic lessons that will save your sound:
Eliminate as many opportunities to add/subtract gain as possible.
Unity means that the signal coming in is the same signal coming out. This is a great reference spot and should be your starting place.
Mark/save every volume source you can.
Once you’ve set you gain stage and something still isn’t right, move backwards step by step.
Remember that the level out your sampler affects the rest of your signal chain, the levels of the amp only amplify the sources given to it. Use this to your advantage.
Here are some personal lessons I've learned over the years:
Address the issues before they become issues!
Clipping is to audio as late concert drums hits are to front ensembles: Everyone hears it.
Have a game plan.
Things will go wrong, but 99% are fixable if you follow the signal path.
Keep calm, cool, and collected...because electronics will make you want to do some Office Space type things to your equipment.
Use your ears.
Cheers!


Comments